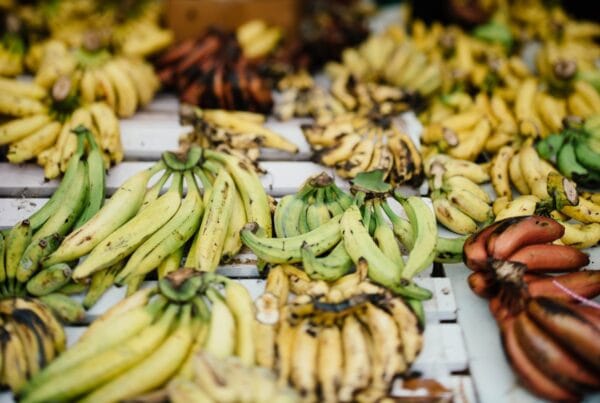
Belizean cassava bread is finely grated cassava wrung dry, shaped into rounds, dried until stiff, then browned over heat until crisp. It is flat, firm, and slightly bitter. Nothing like wheat bread, and not trying to be. Across the Caribbean it goes by bammie, bammy, or casabe. The same tradition, the same process, names that shifted depending on who was speaking and which island or coast they came from. In Belize it is most closely associated with Garifuna cooking.
I first made this the right way with my aunt, who kept a piece of old muslin specifically for wringing cassava. She packed the grated root into the cloth, twisted until her knuckles went white, and kept pressing long after I thought it was done. The meal went onto a tray that evening and sat until morning. By the time we cooked it the next day, it had the texture of slightly damp sand. That is exactly where it needs to be.
The wringing step
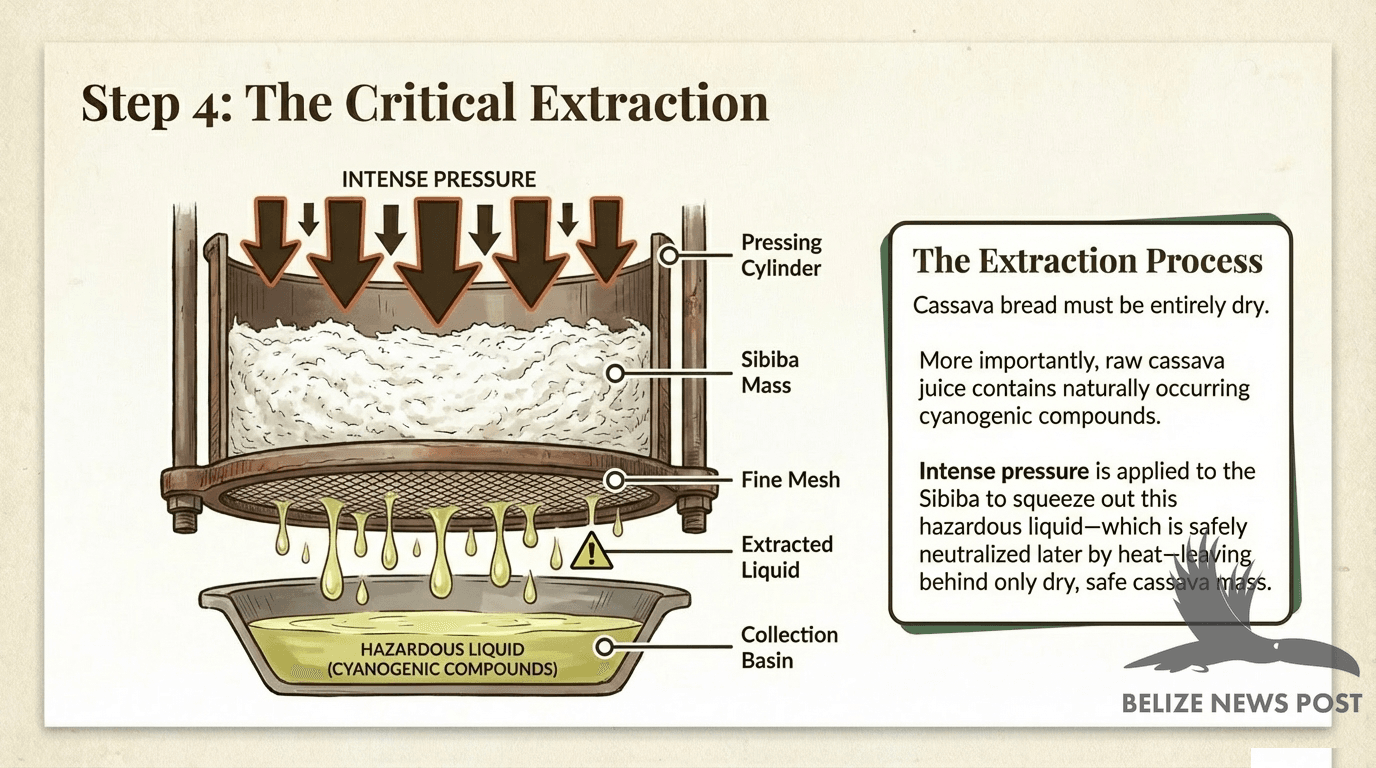
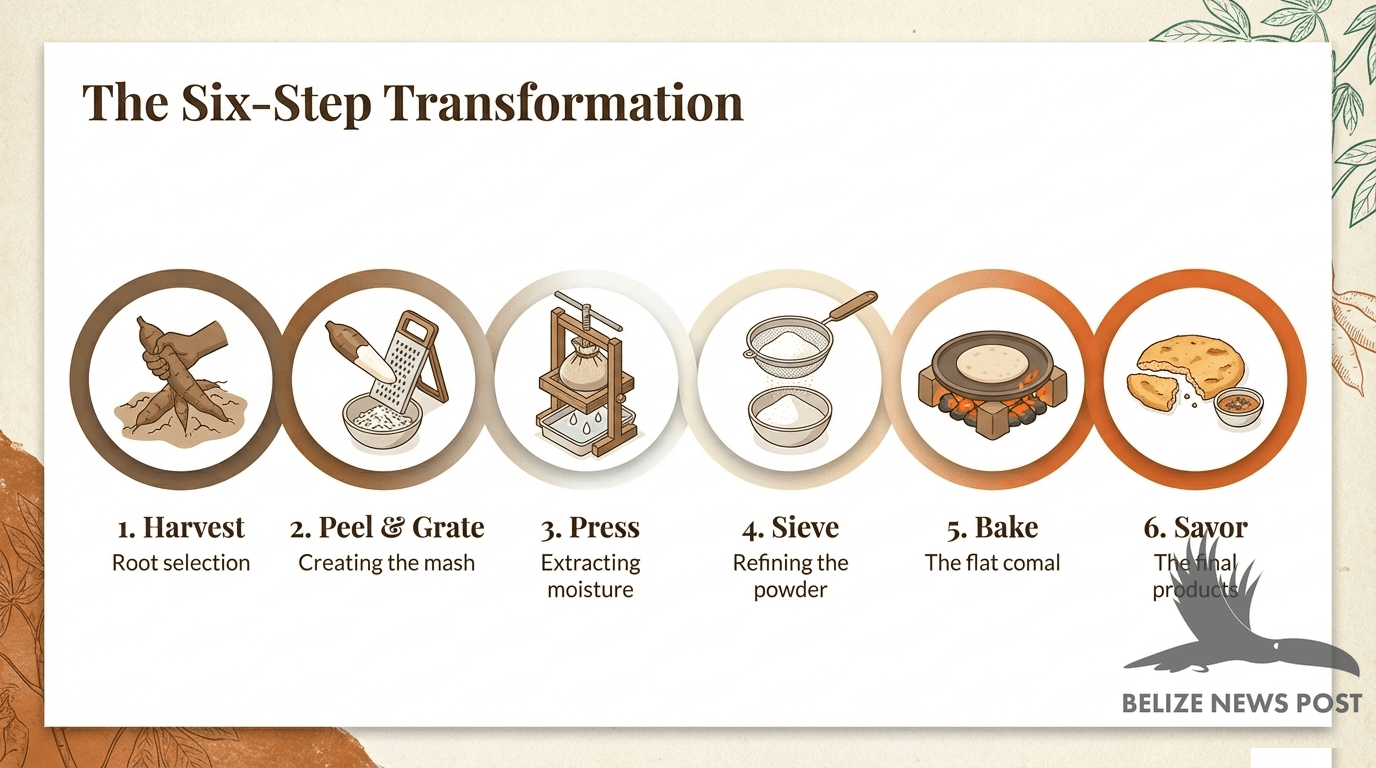
Wringing out the cassava juice is the most important step in this recipe, and it is not optional. Grated cassava holds a significant amount of liquid, and that liquid has to come out before the meal can dry properly and before you can cook it. Pack the grated cassava into a strong cloth (a clean dish towel, a piece of muslin, or a doubled layer of cheesecloth), then twist and press firmly over a bowl until no more liquid runs out. You will be surprised how much comes out. What remains in the cloth is the dry cassava meal you will work with.

After wringing, spread the meal out in a thin layer on a clean tray or baking sheet, uncovered, and leave it at room temperature overnight, eight to twelve hours. By morning it will feel slightly damp but no longer wet, and it will hold together when you press a handful of it. That is the right stage to shape and cook. In the traditional process, the meal is passed through a fine hand-woven sift at this point to remove any remaining fiber and produce a smooth, even texture. A fine-mesh sieve does the same job at home if you want the cleaner result.
Shaping: rounds or one large flat
The form factor depends on what you are making it for. For everyday use, small individual rounds are practical. You set tin rings on a greased pan, pack cassava meal into each one, let the heat set the shape, then lift the rings off and flatten the rounds further with the back of a spoon. English muffin rings work well as a substitute, as do wide-mouth jar lids with the rubber insert removed.
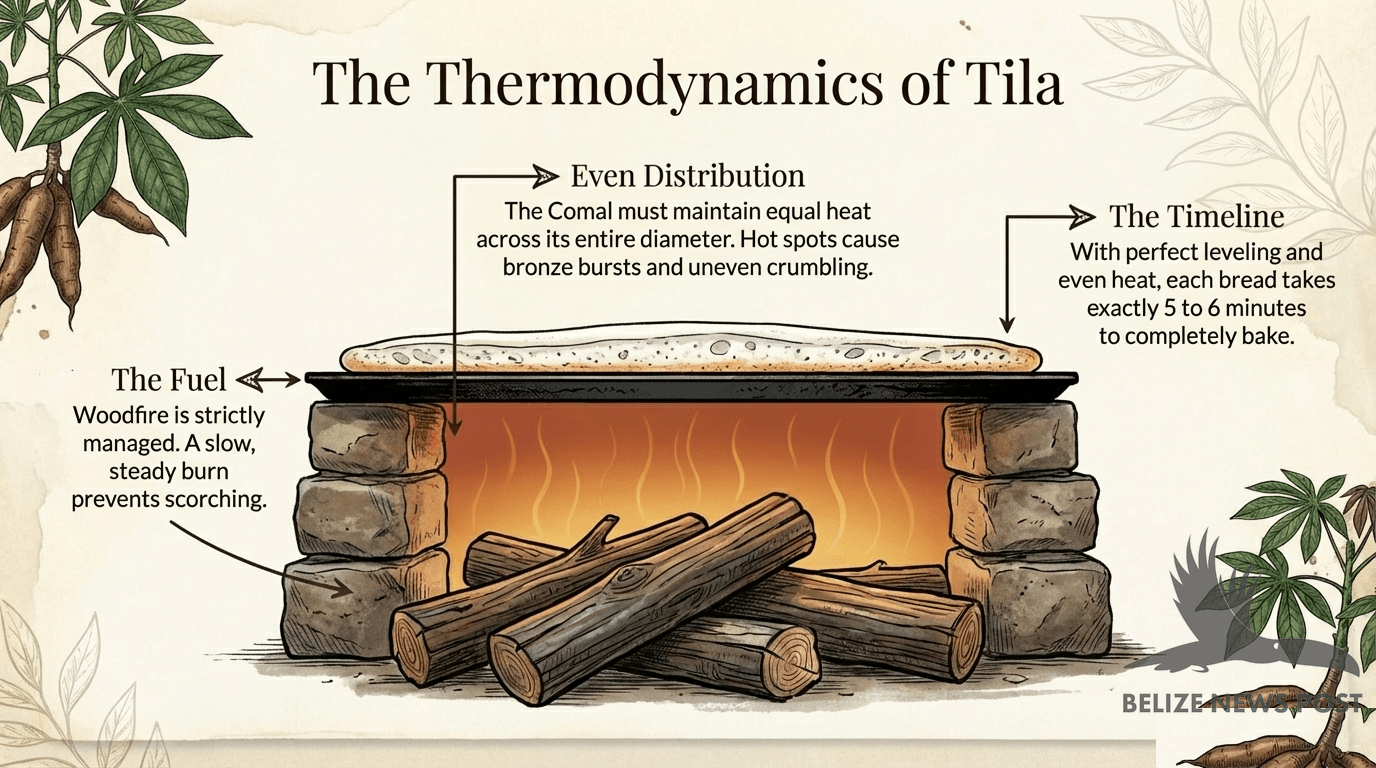
For a larger batch or a more traditional preparation, the meal goes straight onto a wide greased griddle or comal, no rings, and is pressed out into one large round like an oversized flatbread. As it cooks, thin spots are filled and patted down with a wooden tool to keep the thickness even across the whole surface. One flip, then off the heat, then split into quarters. The same family might make small rounds on the stovetop on an ordinary day and one large round on the comal for a gathering. Both are correct.
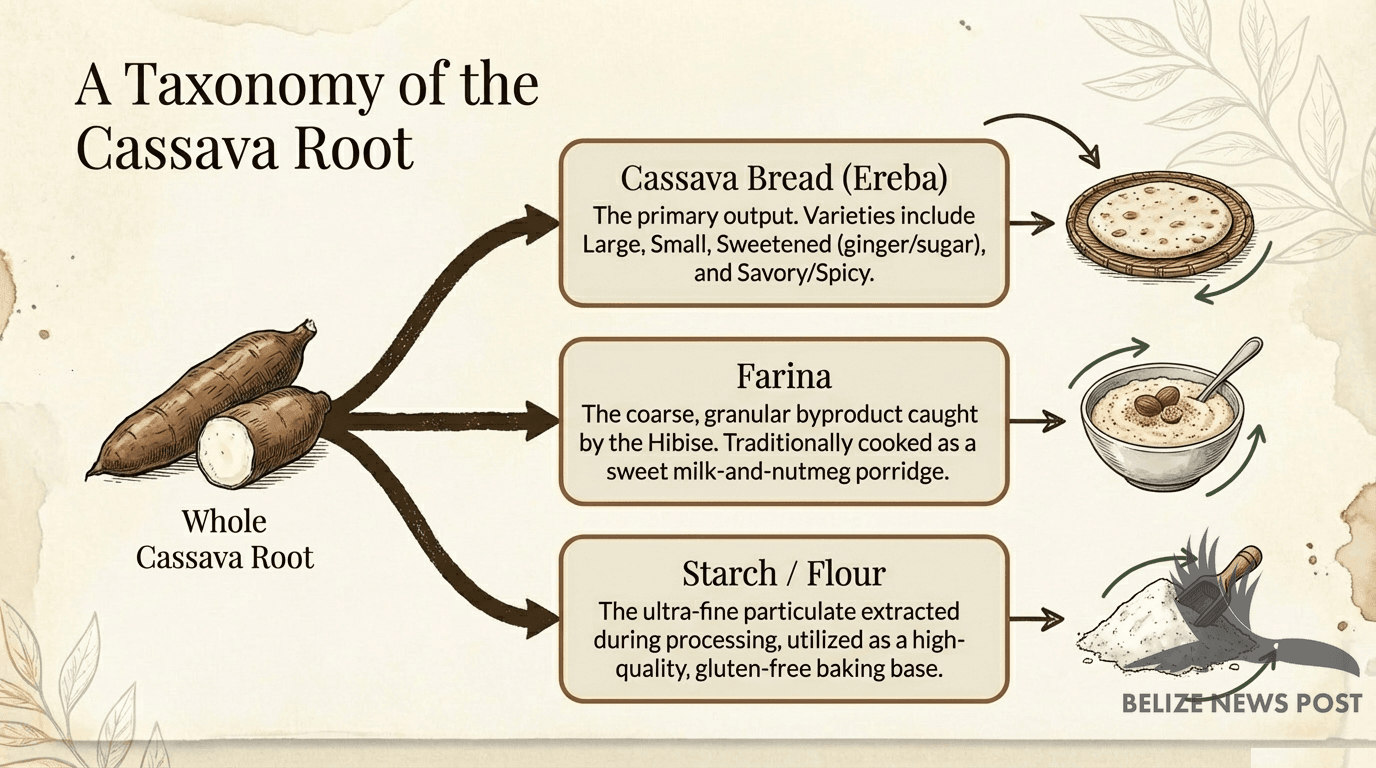
Cassava bread is one of the oldest foods in the Western Hemisphere. It traces to the Amazon basin at least a millennium before the Common Era, carried through the Caribbean by indigenous peoples over centuries of migration and trade. The Garifuna, who settled the Belizean coast in the early 1800s, brought the tradition to Belize. Their version, ereba, uses bitter cassava processed through a traditional press and is central to Garifuna foodways across Belize, Honduras, and Guatemala. This recipe uses sweet cassava, more widely available outside the coast, with the same core technique. The same preparation exists today across Cuba, Haiti, Honduras, the Dominican Republic, Venezuela, and throughout the Caribbean under the name casabe, documented as living cultural heritage by UNESCO. For more on the Garifuna tradition in Belize, see the guide to Belizean food by culture. Cassava also appears in Belizean dishes like cassava pone and dukunu, though those are baked and steamed preparations rather than flatbread. The casabe tradition across the Caribbean is documented in this UNESCO cultural heritage film.
Belizean Cassava Bread Recipe
Yield: 8 rounds | Active prep: 20 minutes | Cook: 30 minutes | Inactive: overnight (8–12 hours)
Start the cassava meal the evening before you plan to cook.
Ingredients
- 4 cups finely grated cassava (about 2 lbs cassava before peeling)
- 1 teaspoon salt
- Butter or margarine, for greasing and for serving
Instructions
The evening before
- Peel and wash the cassava. Grate it as finely as possible using the fine side of a box grater or a food processor with a fine grating disk.
- Pack the grated cassava into a strong clean cloth (a dish towel or muslin works well). Twist tightly and press hard over a bowl, wringing out as much liquid as you can. Keep pressing until the liquid runs out only in drops. The meal needs to be as dry as possible.
- Open the cloth and transfer the meal to a clean tray or baking sheet. Add the salt and mix it through. Spread the meal out in a thin layer, uncovered, at room temperature overnight.
The next day
- Check the meal. It should feel slightly damp but hold together firmly when you press a handful. If it still feels very wet, spread it more thinly and give it more time.
- Grease a baking sheet and your tin rings or ring molds generously with butter.
- Set the rings on the baking sheet over moderate heat on the stovetop. Pack about ½ cup of cassava meal into each ring, pressing down firmly and evenly with the back of a spoon.
- After a few minutes you will see steam rising. Lift the rings off carefully. Flatten each round further and press it into a clean shape with a palette knife, the flat of a knife blade, or a wooden spoon.
- Move the baking sheet to a warm oven at 170–200°F, or place it in a sunny spot. Leave the rounds until completely dry, firm, and stiff all the way through. One to two hours. They should feel like dry crackers.
- When fully dried, brown them under a hot broiler, on a dry griddle over medium heat, or over an open fire, turning once, until each side has color and the surface is crisp.
- Butter immediately and serve hot.
Cook time reference
| Active prep | 20 minutes |
| Overnight drying | 8–12 hours (inactive) |
| Drying in oven | 1–2 hours |
| Browning | 10 minutes |
| Yield | 8 rounds |
Tips
- Wring harder than you think you need to. Most people stop too early. The meal should feel barely damp when you are done, not damp. Press the cloth in stages, repositioning the meal inside it, and you will get significantly more liquid out than on the first pass.
- Do not rush the overnight dry. Bammie that is not fully dried before browning will steam on the inside instead of crisping. It comes off the heat soft and gummy. The dry stage is what makes the difference. Eight hours is the minimum; twelve is better in humid conditions.
- The bitter taste is correct. Cassava has a natural slight bitterness that does not cook out completely. This is part of the flavor. If you find it too strong, serve the bammie with more butter, or alongside something salty like fish or stew beans, which balances it.
- Butter while hot. The cassava absorbs butter well when it comes straight off the heat. Once it cools, the surface closes up and butter sits on top rather than soaking in. Serve immediately.
- Reheating. Rounds that have cooled can be put back under the broiler for two to three minutes to refresh the crisp. They do not keep past the day they are made. Cassava pone holds for a week; these do not.
Serving
Bammie is good with butter alone, eaten hot as soon as it comes off the heat. It also serves well alongside fish, stew beans, or anything with a sauce to absorb. The rounds stay firm when cooled and can be reheated briefly under the broiler or on a dry pan. They do not keep as well as cassava pone. The texture is best the day they are made.
Estimated nutrition
Per round (1 of 8). Estimates based on standard ingredient labels, without added butter for serving.
| Calories | 200 |
| Carbohydrates | 39 g |
| Fat | 4 g |
| Protein | 1 g |
| Sodium | 72 mg |
Shop This Recipe
Baking Sheet
Half-sheet aluminum is the right size for sheet-pan chicken, roasted plantains, or toasted cassava bread. Nordic Ware's commercial-weight aluminum doesn't warp under the long roast.
Box Grater
Fresh coconut and hard cheese both need a 4-sided box grater — finer than a Microplane for cheese, coarser than a food processor for coconut. OXO's stainless box grater is the canonical workhorse.

Food Processor
Recado pastes built from achiote, garlic, and citrus need a processor that grinds them smooth in one pass. Cuisinart's 11-cup is sized for the recado batches that get portioned and frozen.

Regency Wraps 100% Cotton Ultra Fine Natural Cheese Cloth, 90 sq.ft, Chef Grade
Tamales colados, tamarind paste, and recado prep all need grade 90 cheesecloth — finer than gauze, sturdier than muslin. Regency's multi-yard pack covers a year of straining.

About Isela Post
Isela is a Belizean mother who has been cooking from memory and from markets her whole life. Her recipes carry the food of the Yucatec Maya tradition, the corner store ingredients of daily Belizean life, and the party table of every celebration she has ever fed people at. She writes for the Belize News Post.